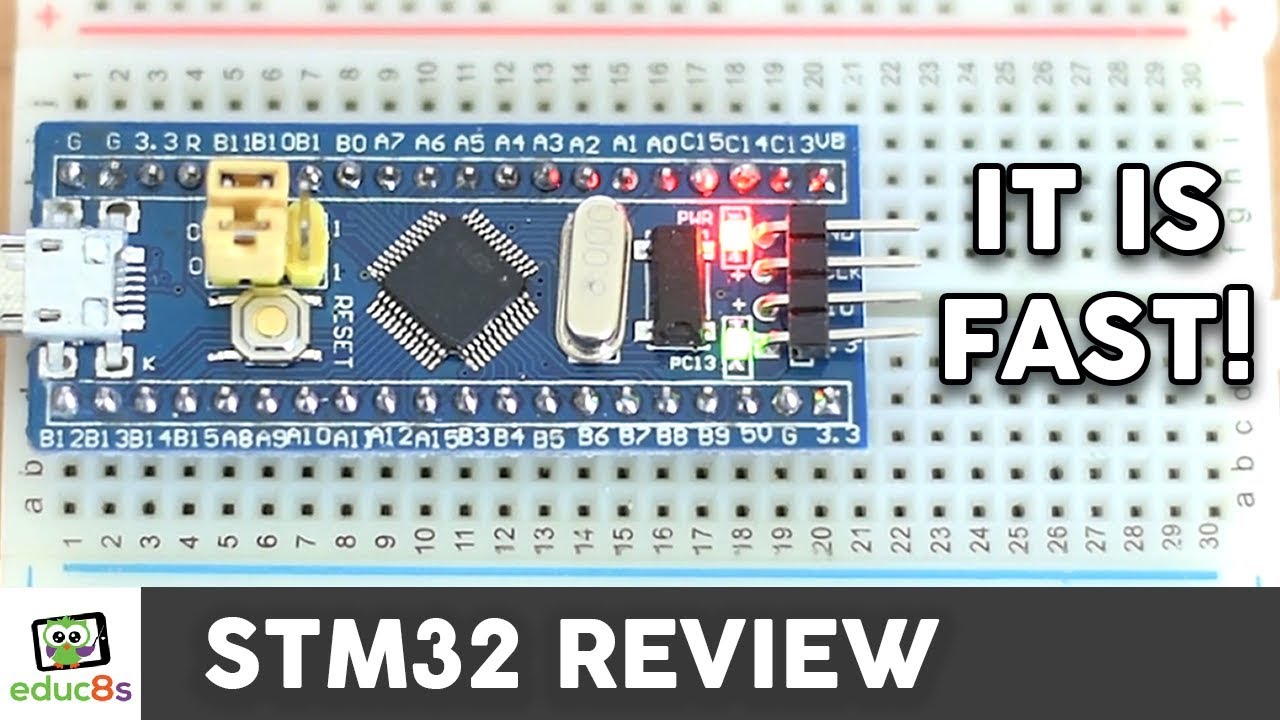
In this Arduino Tutorial, we are going to take a first look at the STM32 Arduino Compatible Board. This board is powerful and inexpensive. Let’s see what it has to offer!
Hello, guys, I am Nick and welcome to educ8s.tv a channel that is all about DIY electronics projects with Arduino, Raspberry Pi, ESP8266 and other popular boards. Today I am very excited because we are going to test this new board which uses the STM32 chip and we are going to learn how to program it using the Arduino IDE. As you can see, I have connected one of my favorite displays; the 1.8” Color TFT display and I have loaded the graphics test program. From this test, you can tell that the board is fast! Let’s now take a closer look at the board!
I discovered this little board some time ago when cmb80amiga, a long time viewer of the channel suggested that I should give it a try. After watching some of his impressive projects with this board on his YouTube channel, I decided to buy one to try it. You can visit his channel by clicking on this card. The board costs around 3$,
——————–
WHERE TO BUY
——————–
STM32 Board: http://educ8s.tv/part/STM32
FTDI Programmer: http://educ8s.tv/part/FTDI
Color TFT: http://educ8s.tv/part/7735
Breadboard: http://educ8s.tv/part/SmallBreadboard
Wires: http://educ8s.tv/part/Wires
Power Bank: http://educ8s.tv/part/Powerbank
Full disclosure: All of the links above are affiliate links. I get a small percentage of each sale they generate. Thank you for your support!
The board I bought, which is also called the blue pill because of the blue color of the PCB, features the STM32F103C8T6 chip, which is powerful, ARM processor! The board is tiny. It is slightly bigger than the Arduino Nano board. Apart from the chip itself, on the board, we can find an 8Mhz Crystal and a 32KHz crystal to drive the internal Real Time Clock. The board uses 3.3V logic levels, but most of its pins are 5V tolerant. Let’s now take a closer look at the heart of the board the STM32 chip.
The chip is a 32bit ARM processor which is clocked at 72MHz! The chip does not offer WiFi or Bluetooth, but it offers, 20KB of RAM and 64KB of Flash memory which is enough to build large projects. It also provides 37GPIO pins, 10 ADC pins, SPI, I2C, CAN, UART buses and a DMA controller. These are impressive specs for a chip that costs 3$. If we compare the specs of the STM32 with the specs of the Arduino Uno, we can see that this small board outperforms the Arduino Uno in every field. The frequency at which the STM32 chip operates is 4.5 times higher than the frequency that the Arduino Uno operates. So, we expect the STM32 to be at least 4.5 times faster than the Arduino Uno.
First of all, to upload a program to the board, we need a USB to Serial module like this one which uses the FTDI chip. We connect Vcc from the module to the 5V pin of the board. Next, we connect GND to GND. Now we need to connect the RX pin of the module to pin A9 of the board and the TX pin of the module to pin A10 of the board. The last step we have to do is to place this jumper to position one, so the module to enter the program mode. We press the RESET button once, and we are ready. Let’s go to the computer now.
——————–
ARDUINO IDE ADD ON
——————–
http://dan.drown.org/stm32duino/package_STM32duino_index.json
——————–
CODE OF THE PROJECT
——————–
???? http://educ8s.tv/stm32-tutorial
——————–
DRIFT MASTER 2017 RACING GAME
——————–
You can download my latest Android Game which is called Drift Master 2017 here:
???? http://bit.ly/DriftMasterAndroid
——————–
MORE PROJECTS
——————–
Arduino Datalogger: https://www.youtube.com/watch?v=oei3Y6tOhVI
Arduino Weather Station Project: https://www.youtube.com/watch?v=9jN-3DtS1RI
Arduino Nokia 5110 LCD Display: https://www.youtube.com/watch?v=aDwrMeu4k9Y
Arduino OLED display tutorial: https://www.youtube.com/watch?v=A9EwJ7M7OsI
DIY Arduino: https://www.youtube.com/watch?v=npc3uzEVvc0
——————–
ABOUT EDUC8S.TV
——————–
Educ8s.tv is a Youtube channel and website which is dedicated in developing high-quality videos about DIY hardware and software projects. In this channel we develop projects with Arduino, Raspberry Pi, we build robots and simple electronic circuits. Check out our website as well for more information: http://www.educ8s.tv
——————–
SUBSCRIBE ON YOUTUBE
——————–
Never miss a video: https://www.youtube.com/subscription_center?add_user=educ8s





I stop browsing naked women to watch your videos. I feel less ignorant by the end. Sometimes i go an build devices with this new found knowledge and even impress my neighbours. I hope you get 1 billion views. Thank you, good night.
Does the display library works without any modification?
You should try burning an stmduino bootloader to it so that you can directly program it via its micro usb port.
can you add wifi/bluetooth? have you got any example projects?
So… STM32 or ATmega 644/1284?
Also what’s up with that 8MHz crystal and 72MHz clock speed? How does that work… for the guy that doesn’t want to explore that Datasheet rabbit hole for the rest of his day 😉
I’ve been curious about the ST MCUs since I realized that most of those super cheap $0.99 voltmeters sold everywhere run a STM8 MCU (8 bit unlike the board shown here). They are like mini dev boards with a 3.3Vreg and a nice little pinout if you remove the 7 segment displays. They even have the ST 1 wire programming pin broken out as well.
-Jake
This would be an awesome board if it only had wifi
I might sincerely get one or two!
Finnish?
Thanks,
Use mbed library to program these boards. They are quite powerful and cheap. There are some variant that could run linux and could be used for building media player
face reveal plz
Does it support library which is available for arduino uC??