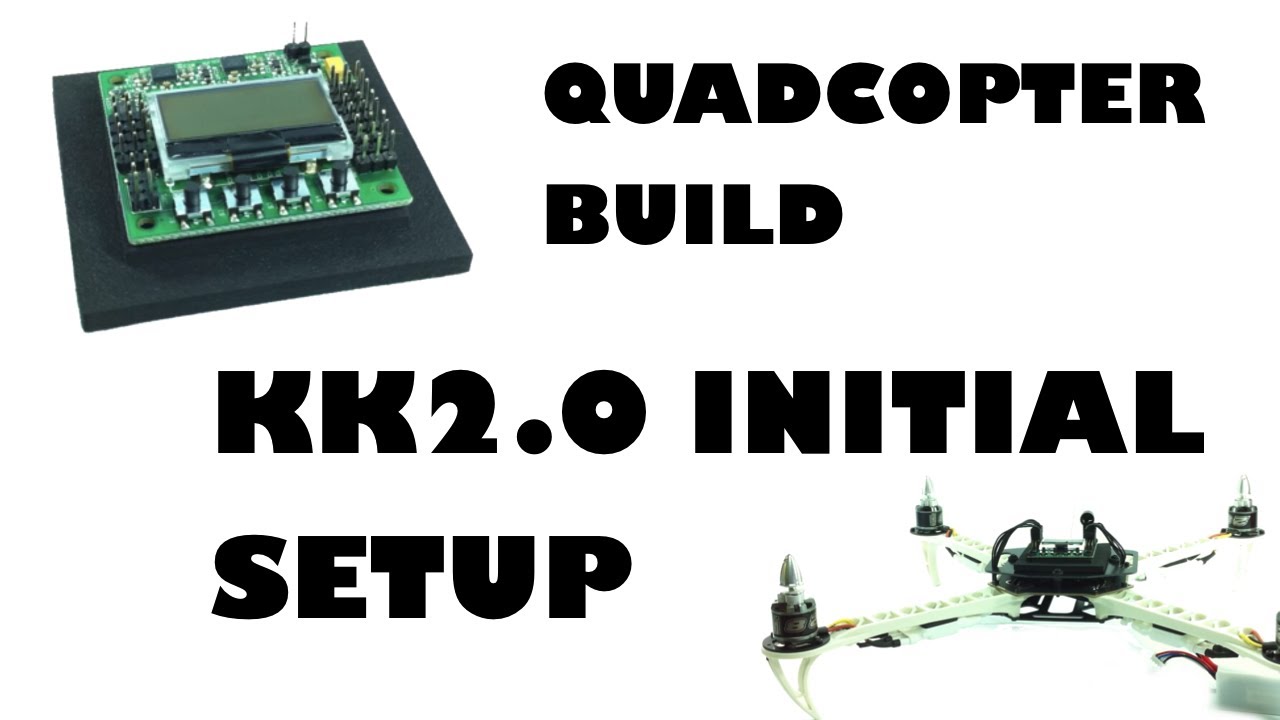
This is 10th video in this video series and it’s about preparing your quad for good and safe first flight.
Setup is mainly related to KK2.0 board and it’s settings but also to some other steps.
Here is part list of all the parts that I am going to use until the end of this build series:
WARNING:
Whenever you are working on a multi-rotor remove your props for safety! Although they look like toys, multi-rotors are very dangerous. If the prop hits you or anybody else it can cause serious injuries.
In first 9 videos (and 4 how-to’s) we’ve almost build this quad. However, setting it up is even more important. If you follow these 11 steps you should have enjoyable first flight. However, certain settings as PI values cannot be set before flight. So, on maiden flight you will have to tune your quad for best performance. Settings shown in the video are great for start with, however, quad will perform sluggish and feel a bit disconnected as they are a bit low. You will have to bump PI values up, but I’ll talk more about this in future videos.
STEP 1 (00:31):
To make sure nothing is left behind, reset the KK2.0 to it’s factory settings.
STEP 2 (00:46):
Perform ACC calibration. This step is crucial because it tells the board what is level. Make sure the quad is on a flat and level surface when doing this. If not, board will think that this is level and it will make the quad drift once in the air. Also, don’t touch the quad during this process.
STEP 3 (1:09):
In “Mode settings” put self-level feature on AUX. That way you will be able to control self-level function in the air using a switch on 5th channel. Also, on maiden flight, make sure that self-level is off. This feature must be tuned properly before using it and it could make things more complicated than necessary on your first flight. Also, check that roll and pitch axis are linked (they are by default).
STEP 4 (1:27):
In “Misc. settings” make sure height dampening function is on 0. This is cool feature, but it should be used after the quad is fully tuned. Most people refer to it as a “poor mans altitude hold” :). Also, it’s more useful for beginner pilots than it is for experienced ones. Basically, this feature tries to maintain altitude when the aircraft is pitching forward by regulating throttle. Experienced pilots do this automatically so thats why it’s more suited for beginners than it is for advanced pilots.
Also, if you have voltage alarm set up (check this video if you don’t: ) here you can set the voltage at which the board will start beeping. For 3S batteries 10.5V is OK (3.5V/cell).
STEP 5 (1:49):
Load QuadroCopter x-mode motor layout. Since this quad is build in X configuration, this is what you must use. Of course, if you have + or any other configuration you should load them in this step. Also, if you want to check current layout, you can do this by going into “Show motor layout” menu where you can see motor layout and motor direction.
STEP 6 (2:09):
Under receiver test you will perform most critical step. Make sure your controls are in right order. So, when you move aileron stick, the same should be happening on the board. Also, check the direction of all channels. If you move aileron to the left, board should do the same. If you have wrong channel order, you can change this in you mixer editor on the transmitter or you can change the leads order on your receiver or on the board itself. If the channel order is correct, but the directions of a channel is wrong, simply reverse/invert this channel on the transmitter.
Also, use your sub-trim function (or if you don’t have one, then your main trims) to adjust main four channels to 0. That way when the stick is in the neutral position, the board will receiver exactly that.
STEP 7 (3:04):
Adjust PI values as I’ve shown in the video. These are recommended by KapteinKuk as best for start with. In my experience, these are a little bit low for this quad and they will have to be increased when tuning.
STEP 8 (3:55):
Set P values for self-level feature as shown in the video.
STEP 9 (4:10):
Perform ESC throttle calibration. KK2.0 makes this step really easy because you can do throttle calibration for all four ESC’s at once. If all of your motors start at the same time, throttle calibration step is completed.
STEP 10 (4:50):
Motors should spin as shown in the video. If not, switch any to motor wires to reverse the motors rotation.
STEP 11 (5:22):
Apply 50% throttle and rock the quad. The motor that you push down should speed up because it tries to compensate your movement.
You need:
Transmitter, quad and a battery.
Enjoy RC as much as I do!
Additional information:
Video: iPhone 4
Editing: FinalCut Pro X
Music: GarageBand


![[On-going] Fail-safe Flight of a Fully-Actuated Quadcopter in a Single Motor Failure Condition [On-going] Fail-safe Flight of a Fully-Actuated Quadcopter in a Single Motor Failure Condition](https://quadcoptersource.tesb1.com/wp-content/uploads/2019/10/On-going-Fail-safe-Flight-of-a-Fully-Actuated-Quadcopter-in-a-Single-Motor-Failure-Condition-200x137.jpg)

![FreeStyle DRIFT X FPV Racing Drone[DRIFT RC CARS] FreeStyle DRIFT X FPV Racing Drone[DRIFT RC CARS]](https://quadcoptersource.tesb1.com/wp-content/uploads/2020/09/FreeStyle-DRIFT-X-FPV-Racing-DroneDRIFT-RC-CARS-200x137.jpg)


this is a really good tutorial, I having some problem when I try to spin my
motors sometimes motor 1 stops, do you know why this is happening? thanks!
It could be a lot of things. Sync loss, ESC not calibrated, bad ESC. Does
this always happens with the same motor? Try switching the motor.
how do you add a separate acting motor onto the board, say i wanted to make
a tricopter that had a drive system for taxiing how could i make this
reality with the kk2?
Some more advice… adjust your P gains higher if your quad takes off and
then rolls over. I used 50 as a starting point.
I cant spin my motor with kk 2.1 and how to celebration my esc. Please help
me
hey, I had trouble with my kk2 so I tried your settings and now its beeping
continuesly …WTF is going on why is this happening ??? .and I can’t get
it to ARMED mode …
this has fixed the problem now when i try to armed mode it starts
beeping……!!
+LISA CHAN HI. You know the KK beeper goes off to let you know its armed.
When you give it throttle the buzzer stops.
hi john the buzzer stays on all the time so I cut the wires took the
buzzer of and connected a led light and bought a new transmitter now I can
fly my quad and the light stays on …
+LISA CHAN You didnt hook them to the battery monitoring pins did you? “Cut
the wires”? Im puzzled…buzzers and led are the two pins near the top
left. The new 2.1.5 makes a better job of identifying the pins, btw.
the very top left is the buzzer you can do anything you wont with the pins
, under that you have the battery pins I don’t have anything connected to
this as you don’t need to , I have a volt meter on the side of my
quadcopter so I can see the volts , and a low volt meter on the battery
….
My board is beeping when arming with the command “Left Analog Down and to
the right”
Hi there, thanks for the great videos
In step 11, I rock the quad as described but it doesn’t sound to me like
there is any difference in motor speeds.. could I have done something
wrong?
Richard
It’s relatively hard to hear the difference. Put your ear next to the motor.
sorry for the silly question, Im a total noob building a quad from scratch,
does the kk2 come with the required cables to connect the RC Turnigy 9X 9Ch
Transmitter w/ Module & 8ch Receiver (Mode 1) (v2 Firmware) or does the
transmitter comes with the cable?
If not do I need to buy a specific cable to connect both, 320 female to
female?
Hello, can you help me please, on my kk2 when I am doing a receiver test it
is telling me all my channels but 1 (throttle) have no signal, but my
reciever is definitely binded.
Do you have CPPM on? Only use it if the Rx supports it. It passes all the
control signals through only the throttle input, so it lets you eliminate
the other 3 Rx to KK cables. It should be OFF if you have a regular mode Rx.
Help
I can’t get my motors to spin, I do the throttle pass thought and then
nothing happens when I throttle up, no motors spin. Also I. Cant sub trim
enough to be able to zero the channels, it’s like my sticks have bad
springs. 120 sub trim isn’t enough to be able zero said channel. My ESCs
are warm to the touch, is that correct?
Very nice video. Just gives you the information you need. Simple to
understand, perfect for any skill level. Great editing too.
Thanks!!
on my kk2 when I am doing a receiver test it is telling me all my channels
have no signal, but my reciever is ok. Somebody can help me??????
Thanks a whole lot! This video was the only reason I got my first quad
flying!
I am a Naza guy, however I am building a fun fpv light racer and figured
I’d give the KK board a shot since it’s a third of the price. Now after
watching your video, which I very much appreciate, I am very confident this
board will do what I want. Thank you for the video and time you put in
making it.
Hi. So I have a 2.1.5, and Im using a 4 in1 ESC. When I test the motors,
and use the sticks to test the controls, the motors that speed up usually
stay up, until I give it opposite stick. Was it a bad idea to try the 4
in1? Also, Im already spec-ing my next build, but its with opto esc’s. How
do I connect the UBEC Im getting to the FCM, if the usual sets of pins
arent available? You know the KK only powers up on the M1-8 side on the M1
pins. Thanks.
ps….edit…Sub’d..by the way…thanks for the vid!!
any helpfull advice/tips for the acc calibration? thx #eluminerRC
+TaHaL L. Use perfectly flat surface and don’t touch anything while
calibration is running.
what kind of perfectly flat surface? examples? I tried a lot… but I
didn’t get good results #eluminerRC
+TaHaL L. Well… table. Just make sure it is level using bubble level.
However, I don’t think this is causing you problems (if you have one).
Wonderful video. I’m curious. I watched both of your vireos on the same
topic, but your setting numbers are not even close to each other. I guess
I’m asking which ones do I use? Also do these numbers relate to a
tricopter?
This is INITIAL SETUP video. The best way to start up in my opinion. After
that, you should tune you copter by following my TUNING GUIDE. Tricopter is
a little different, but the procedure is the same.
Espectacular lo tuyo.,por fin alguien muestra con detalle la programacíon
de este aparatito thank you te felicito daniel
simple and thorough. thank you! this helped alot!
Thanks!
This is one of the best no nonsense and complete video for noobs and for
reference.
Any plans to do kk 2.1.5 aio RC911 firmware?
Thanks! No plans for RC911 for now.
Amigo estou com problema , eu calibrei no nivel , e trimei meu radio mesmo
assim ele voa puxando pro lado oque eu devo fazer ?
I did same thing to my but motors don’t arm any idea
I mean can’t get the to start. ..all settings looks closely to yours any
advice thanx
do you have any suggestions if my motors do not start/stop at the same
time? I think I might need to update firmware on my ESC’s but dont want to
mess with soldering to pins if i dont have to
Terimakasih, Komandan.. Atas tutorial youtube yg dimuat. Sangat bermanfaat
buat saya pada saat beli, setup awal. Terimakasih, salam hormat. Yan
endigo, Surabaya, East Java, Indonesia.
Best regard.
Very well explained your video
I have the following problem: perform all the steps you explain in the
video but the engines do not move,
solamenten move when oppressed have 2 buttons, loose and stop working.
Thanks for your help.