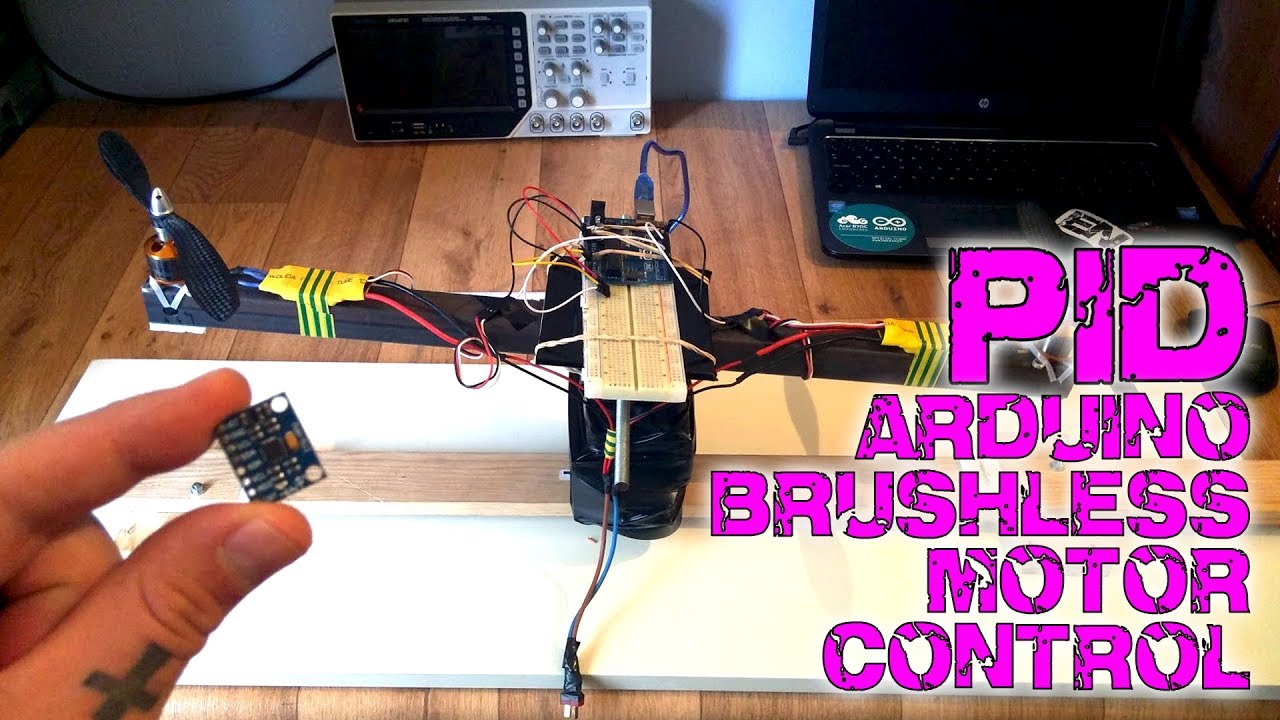
This is just a PID brushless motor control with arduino. It’s not perfect due to the huge weight of the metal bar and cheap motors. The constants will definitely vary depending on the used ESCs, motors, size, weight, etc. The idea is that nowm that you know how PID works, you could fine tune your flight controller.
Stay tune for next videos about the arduino flight controller code. I’ll explain how gyro works and how to merge this PID control for two axis.
Help my projects on Patreon : https://www.patreon.com/ELECTRONOOBS
my Q&A page: http://electronoobs.com/eng_preguntas.php
Arduino drone tutorial: https://www.youtube.com/watch?v=S8TSkGQ2EWY&t=2s
——————LINKS——————–
PID tutorial webpage: http://www.electronoobs.com/eng_robotica_tut6.php
Arduino drone webpage: http://www.electronoobs.com/eng_robotica_tut5.php
—————-MATERIAL—————-
MPU6050: https://rover.ebay.com/rover/1/711-53200-19255-0/1?icep_id=114&ipn=icep&toolid=20004&campid=5338106513&mpre=http%3A%2F%2Fwww.ebay.com%2Fitm%2FMPU-6050-6-DOF-3-Axis-Accelerometer-Gyroscope-Sensor-Module-GY-521-for-Arduino-%2F201004496054%3Fhash%3Ditem2ecccd34b6%3Ag%3AUjQAAOSwstxVXYz8
ESC 20A: https://rover.ebay.com/rover/1/711-53200-19255-0/1?icep_id=114&ipn=icep&toolid=20004&campid=5338106513&mpre=http%3A%2F%2Fwww.ebay.com%2Fitm%2F20A-20-A-Brushless-Motor-Speed-Controller-RC-BEC-ESC-For-helicopter-JL-%2F162275780299%3Fhash%3Ditem25c863e6cb%3Ag%3AobEAAOSwal5YJEkz
2212 brushless motor: https://rover.ebay.com/rover/1/711-53200-19255-0/1?icep_id=114&ipn=icep&toolid=20004&campid=5338106513&mpre=http%3A%2F%2Fwww.ebay.com%2Fitm%2FA2212-930KV-Brushless-Outrunner-Motor-For-RC-Helicopter-Aircraft-Quadcopter-%2F201930528504%3Fhash%3Ditem2f03ff56f8%3Ag%3AQZgAAOSw5UZY~yd6
1245 propellers: https://rover.ebay.com/rover/1/711-53200-19255-0/1?icep_id=114&ipn=icep&toolid=20004&campid=5338106513&mpre=http%3A%2F%2Fwww.ebay.com%2Fitm%2FF05327-4-Pairs-12×4-5-3K-Carbon-Fiber-Propeller-CW-CCW-1245-Props-Cons-For-DJI-%2F111572986105%3Fhash%3Ditem19fa44a8f9%3Ag%3A2pkAAOSwGIRXcNyf
LIPO connectors: https://rover.ebay.com/rover/1/711-53200-19255-0/1?icep_id=114&ipn=icep&toolid=20004&campid=5338106513&mpre=http%3A%2F%2Fwww.ebay.com%2Fitm%2F10-Pairs-20pcs-T-Plug-Connector-Female-Male-Deans-For-RC-Lipo-Battery-Helicopter-%2F282414841624%3Fhash%3Ditem41c13c7f18%3Ag%3A644AAOSwol5Y3H6I
—————-SCHEMATICS————
(if you want to calibrate the ESC before starting)
ESC calibrate: http://www.electronoobs.com/images/Robotica/tut_5/ESC_calibrate.png
One axis schematic: http://www.electronoobs.com/images/Robotica/tut_6/One_axis_scheamtic.png
———————CODE——————-
PID code: http://www.electronoobs.com/eng_robotica_tut6_1_code1.php
(if you want to calibrate the ESC before starting)
ESC calibrate: http://www.electronoobs.com/eng_robotica_tut5_1_code1.php
Like share and subscribe to motivate me. Thank you






// ================================================================
// === PID ===
// ================================================================
#include “Arduino.h”
#ifndef _PID_H_
#define _PID_H_
#define gainMax 90
#define gainMin -90
float set_point=0,g1,e,e1;
float system1;
float Es=0,integration=0,derived=0,kp,kd,ki,Gp[3];
unsigned long last_time;
float last_Es;
unsigned long t_now=0;
void set_last_read_pid(unsigned long time, float es) {
last_time = time;
last_Es = es;
}
inline unsigned long Last_time() {return last_time;}
inline float last_es() {return last_Es;}
void Pid(float Setpoint,float System,float KP,float KI,float KD,int SampleTime)
{
t_now = millis();
if(t_now>=SampleTime)
{
Gp[0]= Setpoint-System;
int dt =(t_now – Last_time())*0.01;//0.01;
integration=(Gp[0]+last_es())*dt/2;// integracion númerica po el metodo del trapecio (Gp[0]+last_es())*dt/2;
derived=((System-last_es())); //derivada centrada derived=((Es-last_es())/2*dt);
Gp[1]=derived;
Gp[2]=( (Gp[0]*KP)+ (integration*KI) + (derived*KD) );
// delayMicroseconds(10);
if(Gp[2]>gainMax){Gp[2]=gainMax;}
if(Gp[2]<gainMin){Gp[2]=gainMin;}
set_last_read_pid(t_now , System);
//t=t_now;
}
}
inline float get_PID(int select) {return Gp[select];}
#endif
If you are interested .
passed the controller fuzzy mamdani
Thank you for the effort on your series of videos – they are an excellent balance of theory and implementation! I very much enjoy them!
Awesome ! I’ve never seen anybody on youtube explain these things in a such a detailed way.
Would have been nice to drop some extra weight on one side to see it compensate.
excellent explanation
I have a idea you can tune the PID controller automaticly(auto tuning) to diterminate the the best angle
hey can I use this concept (metal bar with motor) for my test but use a other frame for my drone?
I would really want to understand about proportional navigation law, and you must be the perfect person in both explaining, designing, and making it!!
Yet ANOTHER AWESOME VID DAMN!!
wow Great video Sir Electronoobs. I am wondering if this lesson could solve my problem on PID with a different system…I’m currently working on a wind pendulum project and I hope to adopt your PID lesson to balance the pendulum at center within the shortest time given , the pendulum has 4dc fans attached to its 4sides .how can I apply your lesson? Thanks for your help in advance
That’s the erst time, that someone managed to explain PID values so that everybody can understand! Finally I know how to tune my Quadcopters faster and easier 😀
Awesome! Thank you for this great explanation! Please do upload the rest too..